Installing a dash cam can feel intimidating at first. You might worry about damaging your car, dealing with messy wires, or placing the camera in the wrong spot. These concerns are common, especially if you have never handled in-car electronics before.
The good news is that dash cam installation is much simpler than it seems when you understand the basics. With the right preparation and a clear step-by-step approach, you can set up your device safely and efficiently. A properly installed dash cam not only records your journeys but also provides peace of mind every time you drive.
This guide will walk you through everything you need to know before you begin, from tools and placement to wiring and testing.
Common Challenges Before Installation
Before you start, it helps to understand the most common pain points drivers face:
- Confusion about wiring, especially when hiding cables
- Uncertainty about placement, leading to poor video quality
- Fear of damaging the vehicle interior during installation
By addressing these concerns early, you can avoid mistakes and achieve a clean, professional setup.
What You Need Before You Start
Essential Tools and Accessories
Preparing the right tools makes the process smoother and safer. Here are the basics:
- Dash cam unit and mounting bracket
- Power cable or hardwiring kit
- MicroSD card for storage
- Cable clips or trim tools
- A cleaning cloth for the windshield
Having everything ready before starting helps you avoid interruptions.
Choosing the Right Power Option
There are two common ways to power your dash cam:
- Cigarette lighter adapter
- Easy to install
- Ideal for beginners
- No permanent changes required
- Hardwiring kit
- Cleaner look with hidden wires
- Enables parking mode features
- Requires more effort to install
Choose the option that best matches your comfort level and needs.
Step-by-Step Dash Cam Installation Guide
Step 1: Choose the Best Location
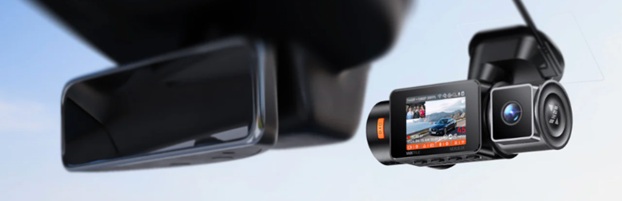
The ideal spot is behind or just below your rearview mirror. This position provides a clear view of the road while staying out of your line of sight.
Make sure the camera:
- Does not block your vision
- Is centered for balanced recording
- Has a stable mounting surface
Step 2: Clean the Mounting Area
Before attaching the dash cam, clean the windshield thoroughly. Dust or grease can weaken the adhesive and cause the camera to fall.
Use a microfiber cloth and ensure the surface is completely dry.
Step 3: Mount the Dash Cam
Attach the mount firmly to the windshield. Press it in place for a few seconds to ensure it sticks properly.
After mounting:
- Attach the camera securely
- Adjust the angle slightly downward
- Ensure the horizon is level
Step 4: Connect the Power Cable
Plug the power cable into your dash cam and route it toward the power source.
If using a cigarette lighter adapter:
- Run the cable along the edge of the windshield
- Guide it down the side of the dashboard
- Plug it into the socket
Step 5: Hide the Wires
For a cleaner setup, tuck the cable into:
- The headliner along the windshield
- The side trim or pillars
- The edges of the dashboard
This not only improves appearance but also prevents distractions while driving.
Step 6: Insert and Format the Memory Card
Insert your microSD card into the dash cam. Then format it using the camera settings to ensure proper recording.
Step 7: Test the Setup
Turn on the dash cam and record a short drive. Review the footage to confirm:
- Clear video quality
- Proper angle and coverage
- Stable recording without shaking
Make adjustments if needed.
Hardwiring vs Plug and Play Installation
Choosing between hardwiring and plug and play depends on your preferences.
| Feature | Plug and Play Setup | Hardwired Setup |
| Installation Ease | Very easy | Moderate |
| Cable Visibility | More visible | Mostly hidden |
| Parking Mode | Limited | Fully supported |
| Cost | Lower | Slightly higher |
For beginners, plug and play is usually the best starting point. Hardwiring can be considered later for a more advanced setup.
Tips for a Clean and Safe Installation
Keep Safety First
Always ensure your dash cam:
- Does not obstruct your view
- Is securely mounted
- Does not interfere with airbags
Take Your Time
Rushing can lead to mistakes. Work slowly and double-check each step.
Use Proper Cable Management
Neatly tucked cables:
- Improve the look of your setup
- Reduce distractions
- Prevent wear and tear
Avoid Overstretching Wires
Leave a small amount of slack to prevent tension on the cables.
Common Mistakes to Avoid
Even a simple installation can go wrong if you overlook small details.
Poor Placement
Mounting the camera too low or too high can reduce visibility and recording quality.
Ignoring the Camera Angle
An incorrect angle may capture too much sky or dashboard instead of the road.
Loose Mounting
A weak attachment can cause the dash cam to fall or vibrate, affecting footage.
Skipping the Test Drive
Failing to test your setup can leave unnoticed issues that only appear when you need the footage.
Understanding Advanced Features
Modern dash cams come with features that enhance your driving experience.
Parking Mode
This feature records activity while your car is parked. It requires a constant power source, usually through hardwiring.
Loop Recording
Loop recording automatically overwrites old footage, ensuring continuous recording without manual intervention.
G Sensor
A G sensor detects sudden impacts and locks important footage to prevent deletion.
Final Checks Before You Start Driving
Before you rely on your dash cam, run through this quick checklist:
- The camera is securely mounted
- Angle is properly adjusted
- The memory card is inserted and formatted
- Power connection is stable
- Recording is functioning correctly
These simple checks ensure your dash cam is ready when you need it.
Conclusion
Setting up a dash cam does not have to be complicated. With the right tools, proper placement, and careful wiring, you can complete your installation confidently. Following a step-by-step approach helps you avoid common mistakes and ensures your device performs reliably.
A well-installed dash cam provides more than just recordings. It adds an extra layer of safety, supports better driving habits, and gives you peace of mind on every trip. Taking the time to install it correctly is a small effort that delivers lasting benefits. Start your installation with confidence, and enjoy the added security that comes with having a dependable dash cam on your side.